Gate
Planning
A gate gets a hard time over the years, from exposure to the changing elements, to all those children playing on it. For gateposts, use wood pressure-treated to Use Class 4. For the gate structure, use used wood pressure-treated to Use Class 3. Fence slats can be made of sawn Douglas fir or softwood, pressure-treated to Use Class 3.
Use stainless steel or galvanized hardware, oversized for improved strength. Paint all metal parts carefully, whatever surface treatment you use.
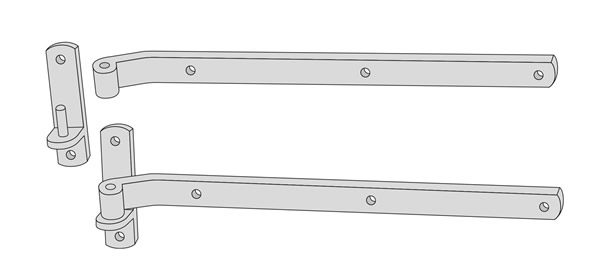
Use long hinges – up to the width of the gate, and bolts for the whole gate construction.
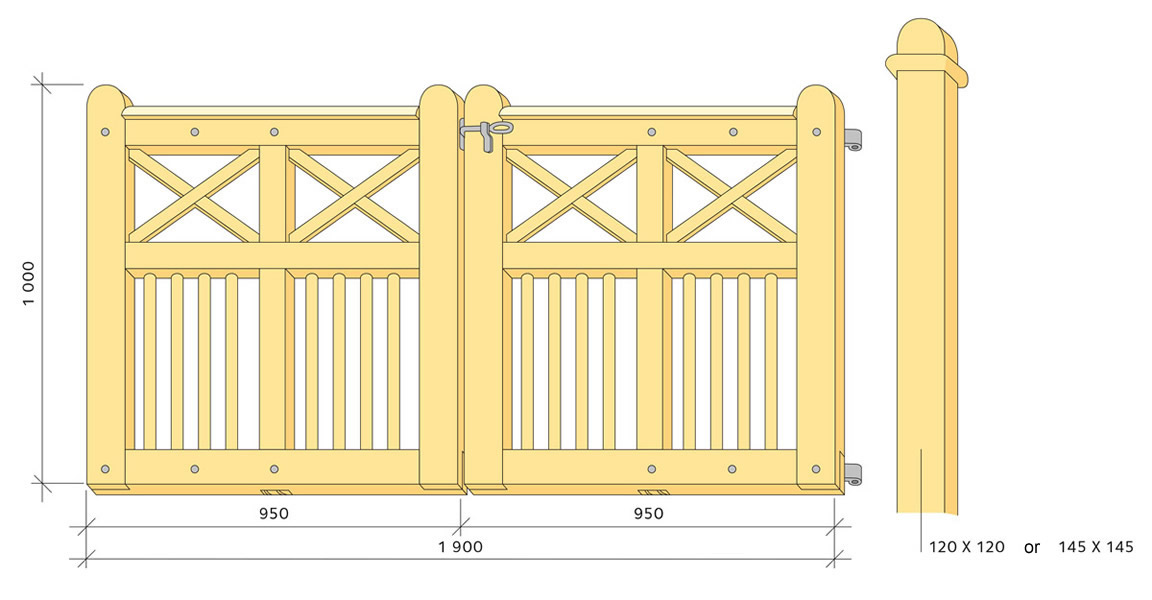
Think about how wide you need the gate to be! A truck requires at least three metres. Each gate is about 950mm wide, giving an opening of approximately 1,900mm.
Take care when measuring and marking. Use a set square. Cut the notches with a broad-bladed and fine-toothed saw, removing the wood with a flat wide chisel. To get the bottom of the notches really flat, finish with a flat file. Cut the upper curved shape and finish with a file.
In Option 1
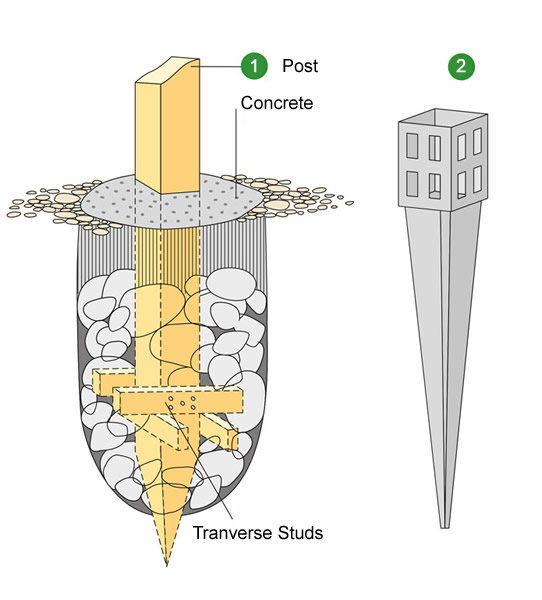
You can drive spiked gate posts up to approximately 2,000mm into an excavated hole as long as you have porous soil. Shape the pointed end before preservative pressure-treatment. When the post is driven in and stands straight, pack the hole tightly with small stones. You might want to use transverse studs at the bottom of the post to add further stability. Fill the top of the hole with concrete.
In Option 2
Use a standard steel spike base, which is driven into the ground with a sledgehammer. The foundation consists of a post shoe welded to a steel spike.
Surface Treatment
Use wood that has been preservative treated to Use Class 3. Treat carefully with wood oil, or with alkyd oil paint. Use wood preservative on any cut or notched surfaces – particularly the feet, which suck moisture from the ground. Soak the feet for a day in a jar of preservative. If painting, use a primer followed by two topcoats of paint specially formulated for external timber. Do not paint wood that has a moisture content higher than 16%. Use an electronic moisture meter to check moisture content.
Paint the gate before fitting the hinges. Be especially careful to properly saturate end grain with paint.
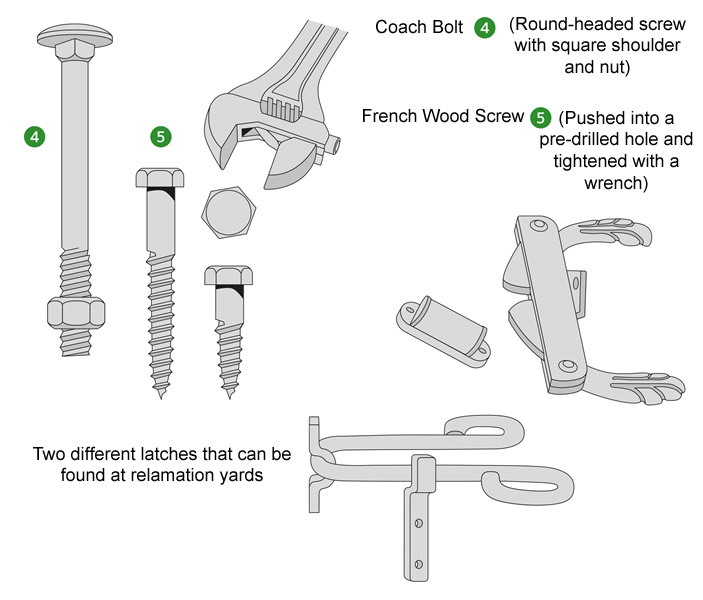
Heavy hot dip galvanized steel hardware is available in lengths from 300 to 1000 mm. The hinges are screwed together with coach bolts. Parts are fitted to the gate posts using French wood screws.
Gate With Cross Bars
This double gate also works well as a single gate. The width of each gate is 950mm and the height is 1,000mm. The dimensions can be adjusted to suit individual preferences. Gateposts are 120 x 120mm or 145 x 145mm. Gate height will match the gate posts and fences.
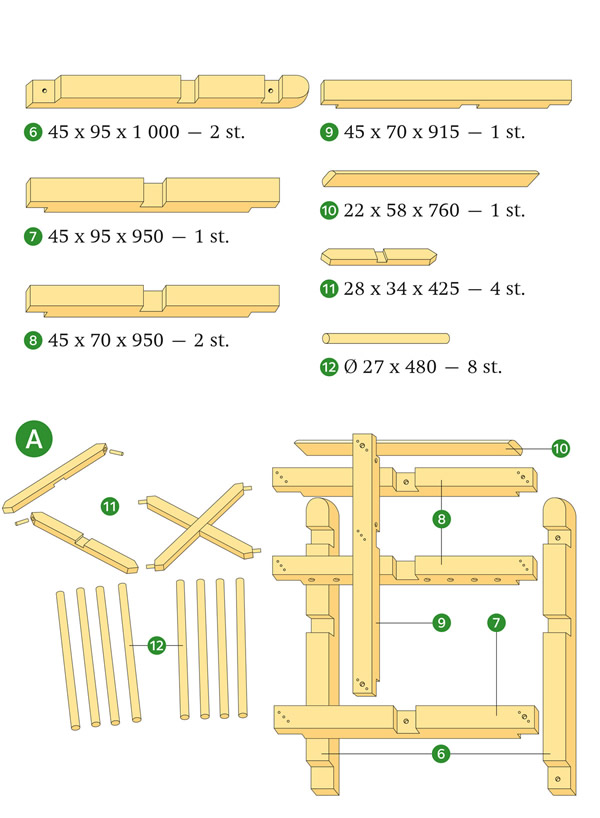
The framework of each gate is divided in half, each with four sections. At the bottom, there are 8 vertical round balusters [12] Ø 27 mm. Drill holes in the frame for a tight fit and glue them in position. At the top, there are [11] two diagonal crosses. These should be assembled before they are screwed into the gate.
Joints should be made carefully and tightly so that the gate has torsional strength and to prevent moisture getting in. Feel free to use a template before assembling the gate to make sure you have the angles right. Screw and glue the half-in-half joints together, using plenty of moisture-resistant glue. Tighten up the joints with clamps while the glue dries. To help parts [7, 8 and 9] shed water, round off the edges with a plane.
Construction Of The Gate With Cross Bars
Picture A shows the gate structure from the back. Drill holes into 7 and 8 to take the round balusters 12. Make sure the bottom holes in particular are completely filled with moisture- resistant glue to prevent water ingress.
10 is a top piece and a little wider than 8. The top rail also covers the top end-grain of 9. In order to facilitate water run-off, round the top rail. To get a good fit for the cross bars [11] test mount them into the gate frame before fixing them permanently. Fix them with four 8mm pins drilled into the side and centre posts of the frame.
Curved Top Gate
If you want to make the gate wider than these dimensions, use a diagonal brace on the inside.
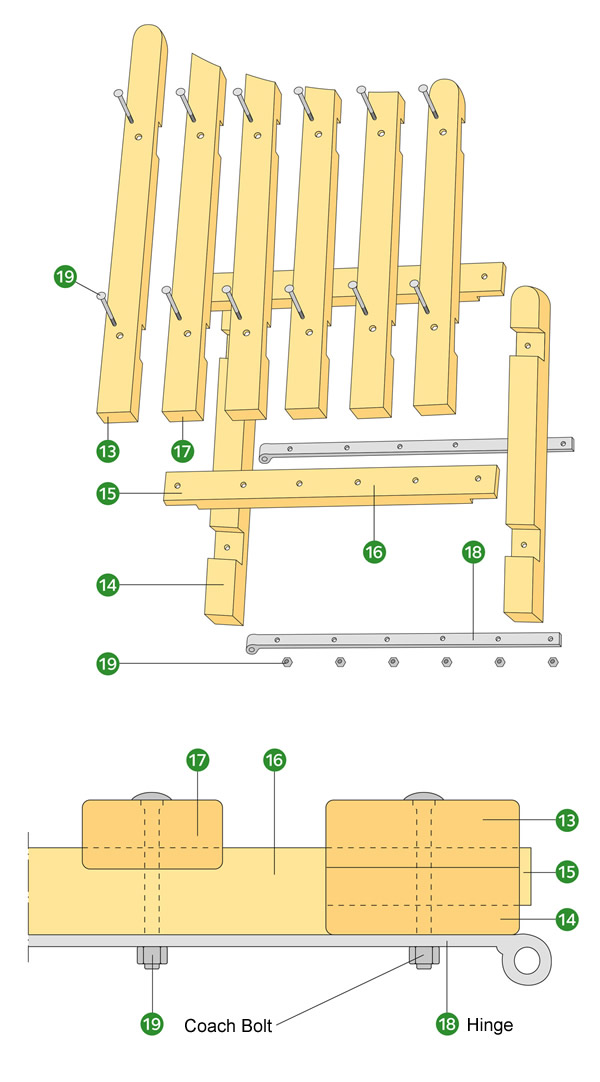
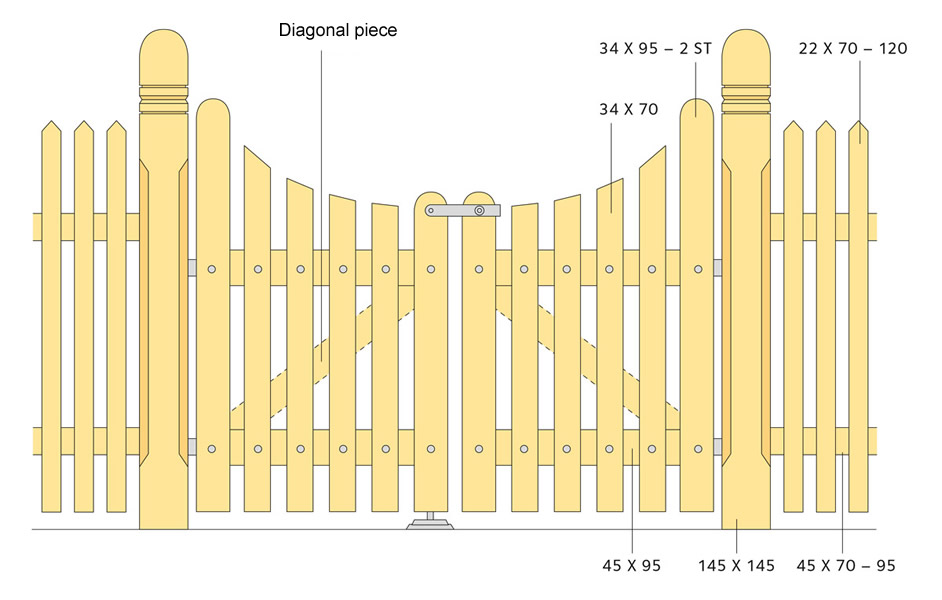
The principal gate posts 13 and 14 are made of two pieces of 34 x 95mm timber.
First, drill the holes and cut the joints at the ends of the two cross bars 16, which will be attached with bolts 15. The distance between the horizontal bars is about 500mm.
Cut corresponding joints in the gate posts 13 (11 x 95mm) and 14 (19 x 95mm). When 13 and 14 are placed together, the cross bars 15 will fit between them in the square 30 x 95 openings. It is important for the gate’s stability and torsional strength that the fit is exact.
The sections 13, 14 and 16 are glued together at the same time, and fixed with coach bolts. The contact surfaces must be flat and they must be pressed together firmly. Tighten the coach bolts 19 with a wrench. Test fix the slats 17 on the cross bars 16. Mark the shape of the slats before assembly and cutting. Place them 45mm apart. Cut out 11 x 95mm joints in the slats where they connect to the cross bars 16. Fix the slats with carriage bolts 19 through the hinges.
Detail: Gate with curved top edge
The detail shows the glued end posts 13 and 14, with recesses for the cross bars 15. The slat 17 has a slot cut to take the cross bar 16. All fixtures and joints are fixed with coach bolts 19 and the moisture-proof glue. The bolts are tightened with nuts on the long hinge side 18. Protruding bolt parts are cut off with a hacksaw and filed flat.
| Name | Dimensions (mm) |
|---|---|
| 13 End Posts | 34 x 95 x 890/1 150 |
| 14 Matching End Posts | 34 x 95 x 890/1 150 |
| 16 Cross Bars | 45 x 95 x 740 |
| 17 Slats | 34 x 70 x 860/880 920/1010 |
| 18 Hinge | 63 x 35 x 740 |
| 19 Coach Bolts | About 7 x 90 |
