Foundations
Use a string to position the posts in a straight line, adjusting the gaps between posts to allow for sloping or uneven ground. You can decrease or increase the gap by up to 2 meters.
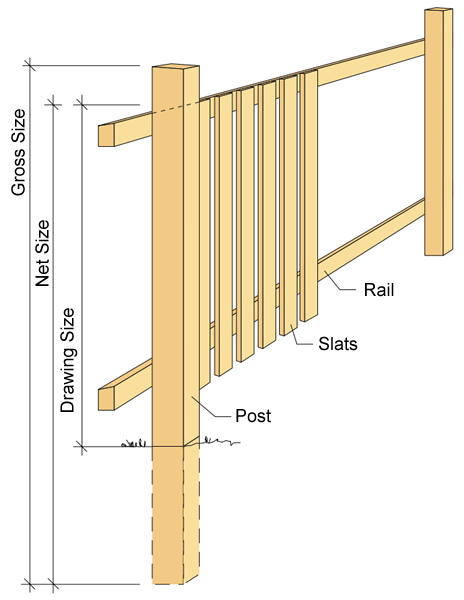
The drawings indicate the height of the posts above ground (drawing size). Add about 150mm when purchasing the wood to take into account varying terrain conditions and foundation height (gross size).
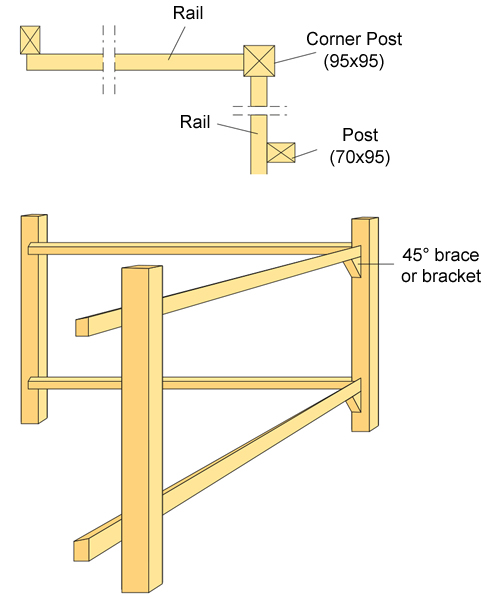
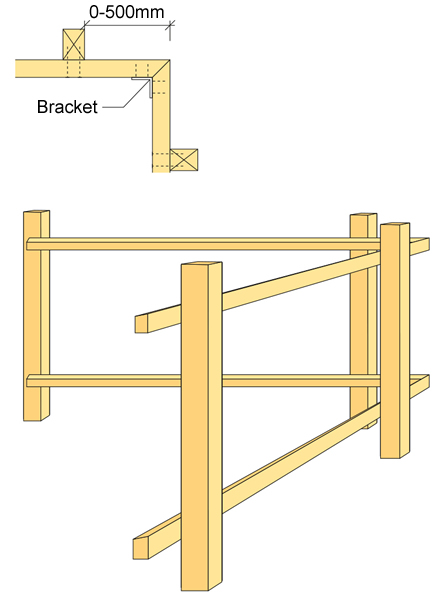
Decide where you want the posts to be at the fence corners. You can avoid some fixing problems by setting a post two uprights away, rather than in the corner.
Also determine how you want the fence to stop. Will it connect to your home or another fence? Remember that it is best to finish the fence with a post.
You will only know a fence is stable once it is completely finished. If necessary, fix 45° braces between posts and rails. Braces are often needed at any openings in the fence and at the fence end. Corner posts are secured in the ground in the same way as the poles.
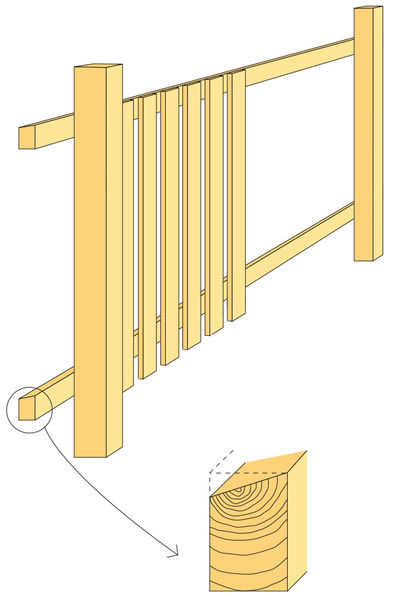
The top of the post should be sawn at an angle to reduce moisture penetration. But do not cut to the finished height until the rails and uprights are in place. Remember to treat any timber you have sawn, notched or drilled with a generous application of preservative.
Making Foundations For Posts
There are two main methods for making the foundations for the fence posts:
Method A – Sinking the post into the soil and concreting
Method B – Anchoring the post with a steel support, driven into the ground with a sledgehammer. The spikes comes in different sizes, typically 50x50mm, 75x75mm and 100x100mm. They come in two lengths, 600mm and 750mm
Method A
Add 400-600mm to the specified height (drawing size) of the post to get the net length of the post. The hole is dug at least 400mm deep for fencing and 600mm deep for decking and pergolas. If you have clay soil, it is good to dig out extra and fill with gravel. The post is braced in the hole with stone and gravel and then filled with coarse concrete. Ensure the post is vertical and correctly oriented before the concrete has set. Instead of concrete, you can fill with gravel or stone and gravel packed to hold the post steady.
Method B
Simply drive the metal spike post holder into the ground with a sledgehammer. Use a driving block to avoid bending the sides of the holder. Use a spirit level to check it’s going in vertically. Once you are happy the spike is driven vertically into the ground, remove the driving tool, insert the post and fix in place with a bolt through the side of the holder.


Rails
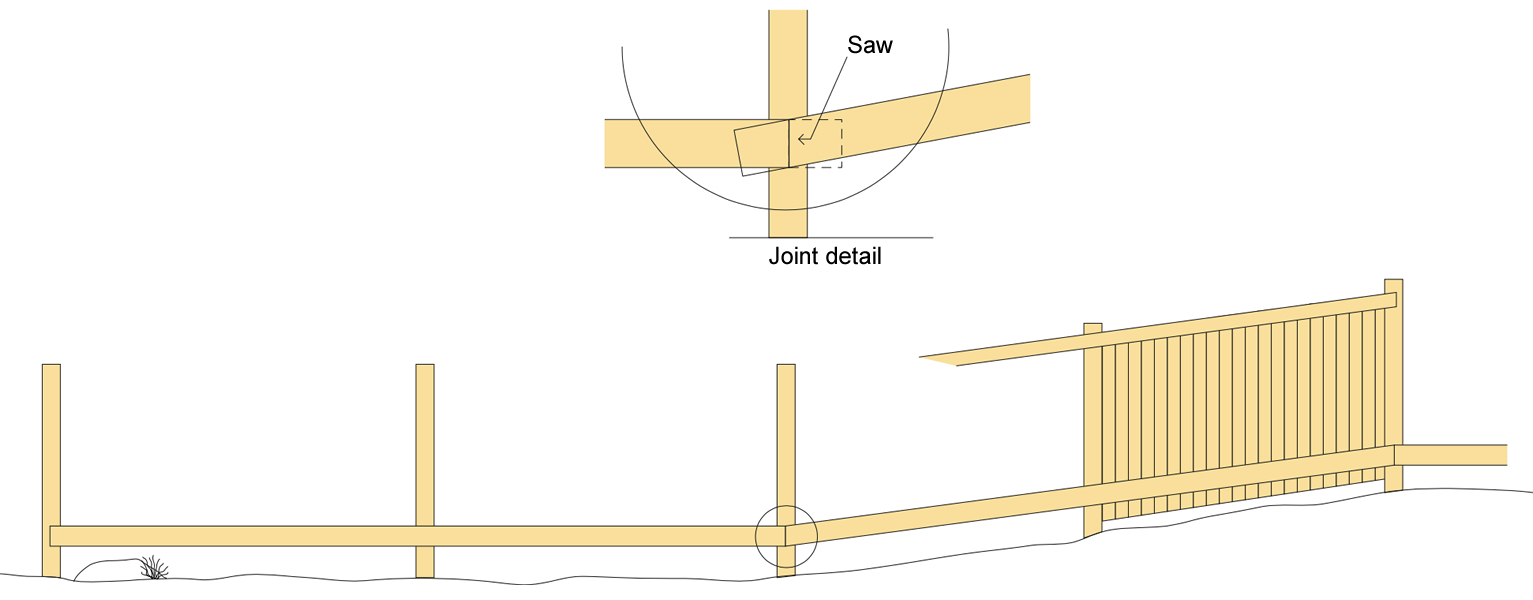
The most common way to compensate for differences in levels is to let the rails follow the ground level. Mark the position of the rails on the posts, attach the first rail temporarily with nails and score it at the post where you want to cut it. Then attach the upper rail and saw through both rails at the middle of the post.
Rails are nailed or screwed to the posts. Since rails are fastened near the end of the piece of wood, the holes should be predrilled to avoid splitting.
When the rails have to be horizontal, for example for a trellis, you will have to step the fence to overcome changes in level. The posts will then be higher.
Angle the top of the rails and slats to shed water.
Slats
We show two types of slats, vertical slats and a trellis-style grid.
If the distance between posts does not exactly match the slats, you can adjust the gaps between the slats or the width of the slats to make it look natural. Fix the slats provisionally to the rails. Use guide boards, so that the slats are level and 100mm above the ground. Once this is complete, and only then, nail or screw the slats to the rails and the rails to the posts. Stainless annular ringed shank nails can be used secure the slats. Then the tops of the slats and posts can be trimmed level to the final height and any trim added to the top rail.
